


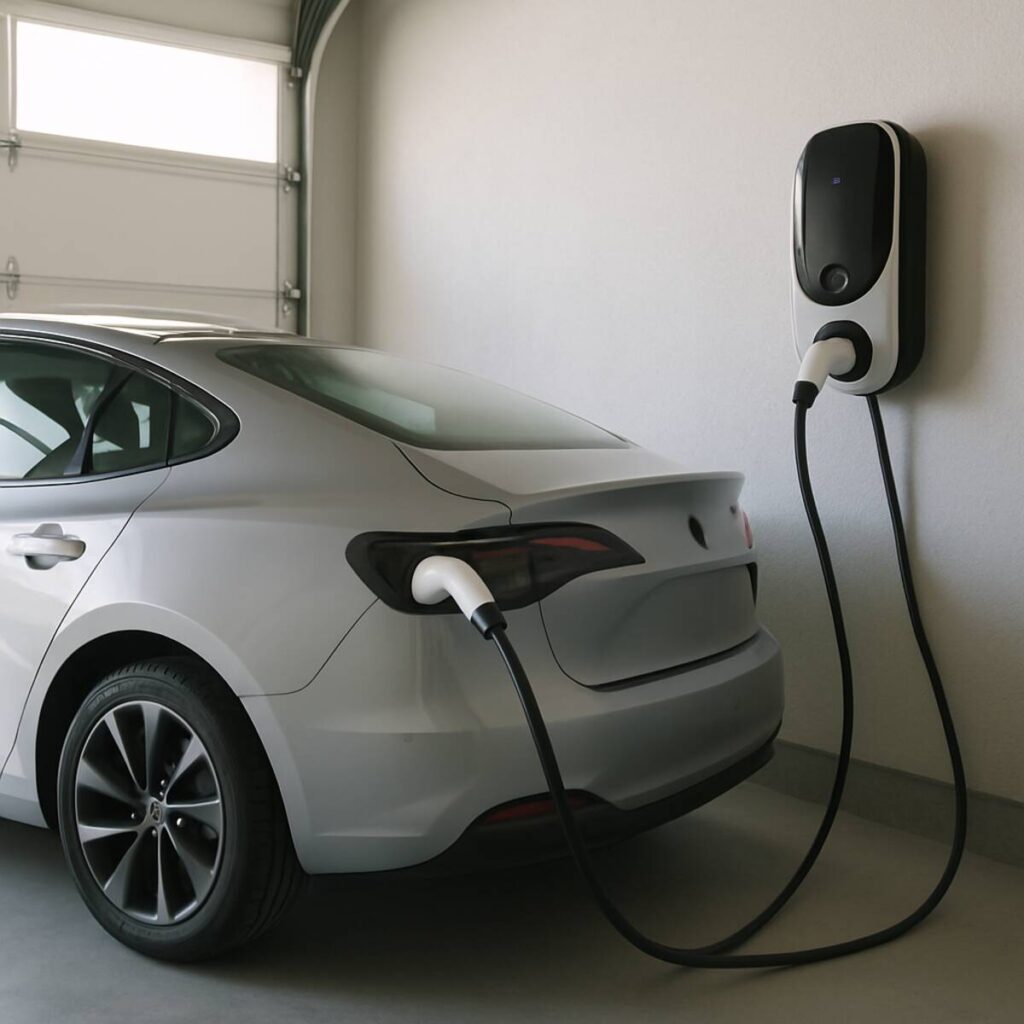
The transition to electric mobility is no longer a distant vision of the future; it is the reality of today. As millions of drivers trade in their combustion-engine vehicles for sleek, quiet, and environmentally friendly electric models, the conversation naturally shifts from the dealership to the driveway. Public charging networks are expanding rapidly, but the true convenience of EV ownership is unlocked when you can “refuel” your vehicle while you sleep. This brings us to a critical milestone for every new EV owner: setting up a reliable, safe, and efficient home charging station. Choose the best EV charger installation Littleton CO.
While it might be tempting to view this process as a simple weekend project, the reality is far more complex. Upgrading your home to deliver a continuous, high-amperage electrical load for hours at a time requires precision, expertise, and a thorough understanding of residential electrical systems.
In this comprehensive guide, we will explore the immense benefits of professional EV charger installation. From evaluating your electrical panel and navigating municipal codes to understanding the latest smart charging technologies and securing federal rebates, this article will equip you with everything you need to know to make informed decisions about your home charging setup.
1. The Foundation of Electric Vehicle Charging
Before diving into the technicalities of installation, it is crucial to understand how electric vehicle charging works at a fundamental level. Not all chargers are created equal, and the type of equipment you choose will dictate your vehicle’s charging speed, your installation costs, and your overall daily convenience.
Level 1 vs. Level 2 Charging
When you purchase a new electric car, it often comes with a standard Level 1 charging cable. This cable plugs directly into a standard 120-volt household outlet. While convenient because it requires no special installation, Level 1 charging is notoriously slow. It typically provides only 3 to 5 miles of range per hour of charging. If you drive more than 30 miles a day, a Level 1 charger will struggle to replenish your battery overnight.
This is why most EV owners eventually upgrade to a Level 2 electric car charger. Level 2 charging operates on a 240-volt electrical circuit—similar to the power required by an electric oven or a heavy-duty clothes dryer. Depending on the amperage, a Level 2 station can deliver between 12 and 45 miles of range per hour, easily fully recharging most EVs overnight.
However, achieving this speed requires specific infrastructure. The standard level 2 home charging requirements dictate that you must have a dedicated 240-volt circuit, appropriate heavy-gauge wiring capable of handling continuous electrical loads, and a breaker properly sized to protect that circuit.
The Anatomy of an EV Charger
Technically speaking, the box you mount on your wall is not actually the “charger.” The true charger is a component built directly into your electric vehicle that converts AC (alternating current) from your house into DC (direct current) to store in the battery.
The wall unit is formally known as EVSE (Electric Vehicle Supply Equipment). Its primary job is safety. It acts as a sophisticated gateway, communicating with your car to ensure a safe connection is established before allowing high-voltage electricity to flow. If it detects a fault, a surge, or a severed connection, it immediately cuts the power. Because this equipment manages such immense electrical loads, ensuring it is installed correctly by a professional is paramount.
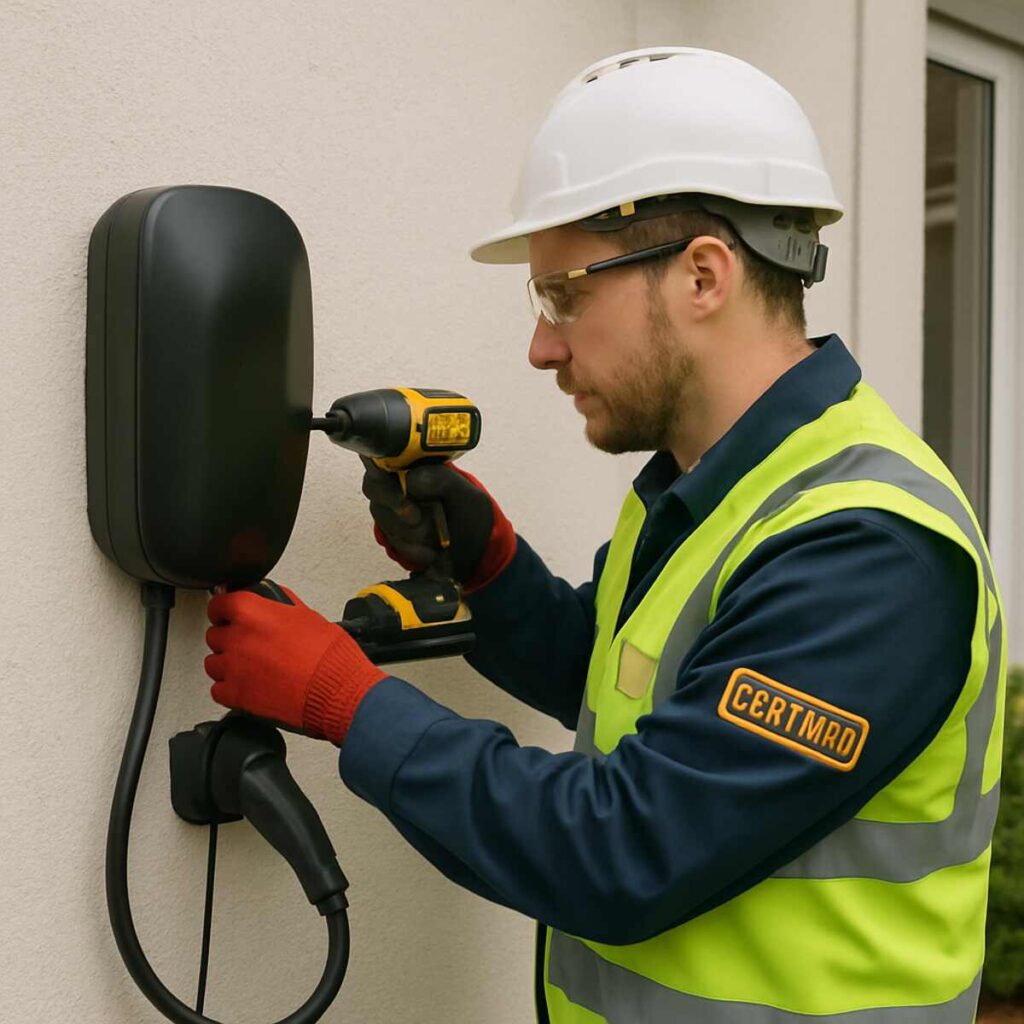
2. The Dangers of DIY: Why Professional Installation is Non-Negotiable
With the rise of internet tutorials, many homeowners consider taking the do-it-yourself route to save money. However, when it comes to high-voltage electrical work, the debate between DIY vs professional equipment mounting is heavily skewed in favor of hiring experts.
Safety and Fire Hazards
Charging an EV is fundamentally different from running a television or a microwave. An EV charger is known as a “continuous load” device, meaning it draws its maximum capacity for three hours or more without a break. This sustained draw generates significant heat. If the wiring is the wrong gauge, if the terminals are not torqued to the manufacturer’s exact specifications, or if the breaker is undersized, the risk of wires melting or an electrical fire breaking out is incredibly high.
Code Compliance and Legal Protection
Electrical codes exist to keep your family and property safe. Hiring a certified electrical contractor ensures that your installation adheres strictly to the National Electrical Code (NEC) and any local amendments. Professionals understand complex requirements, such as exactly what type of wire to run through conduit versus inside a wall, and how to properly ground the system.
Furthermore, almost all jurisdictions have strict municipal permit requirements for charging equipment. A certified electrician will pull the necessary permits and schedule a final inspection by the city. Attempting to bypass this process can have disastrous consequences. If a DIY installation causes a fire, your homeowner’s insurance provider will likely deny the claim if they discover the work was unpermitted and performed by an unlicensed individual.
Warranty Preservation
Most reputable EV charger manufacturers state explicitly in their warranty documentation that the product must be installed by a licensed electrical contractor. If you mount and wire the equipment yourself and the unit subsequently fails, you may find yourself with a voided warranty and an expensive piece of useless plastic on your wall.
3. Assessing Your Home’s Electrical Infrastructure
One of the greatest benefits of a professional EV charger installation is the initial site assessment. Before any wires are cut or holes are drilled, a thorough evaluation of your home’s electrical capacity must take place.
Understanding Panel Capacity
The heart of your home’s electrical system is the main breaker panel. Determining the existing electrical panel capacity for residential charging is step one. Older homes were often built with 100-amp or even 60-amp electrical panels, which were perfectly sufficient decades ago. However, modern homes with electric HVAC systems, electric water heaters, induction stoves, and hot tubs often require 200-amp or 400-amp panels.
Adding an EV charger—which typically requires a dedicated 40- to 60-amp breaker—to a panel that is already near its limit can cause the main breaker to trip, shutting off power to the entire house.
The 80% Rule
Electricians calculate load based on the NEC’s 80% rule for continuous loads. This rule mandates that a circuit can only be loaded to 80% of its maximum safe capacity for continuous use. Therefore, if you want your charger to deliver 48 amps of power to your car, you cannot use a 48-amp or even a 50-amp breaker. You must install a 60-amp breaker and properly sized wiring to safely handle the continuous 48-amp draw. A professional electrician will perform a formal load calculation to ensure your panel can safely support this addition.
What to Do If Your Panel is Full
If your electrician determines that your current panel lacks the capacity for an EV charger, you generally have two options:
- A Panel Upgrade: This involves replacing your entire electrical panel with a larger one (e.g., upgrading from 100 amps to 200 amps). While this is a robust, future-proof solution, it is often expensive and time-consuming, sometimes requiring the utility company to upgrade the main line running to your house.
- Load Management Systems: This is where modern technology shines. If you are wondering what is an EV load management system, it is a brilliant piece of hardware (like a DCC-9 or an Emporia Vue module) that monitors your home’s total power consumption in real-time. If it senses that your home is approaching its maximum electrical capacity (for instance, if the AC, oven, and dryer are all running simultaneously), it automatically pauses or throttles down the EV charger. Once the household load drops back to a safe level, it resumes charging the car. This smart workaround often allows homeowners to install high-powered chargers without paying thousands of dollars for a panel upgrade.
4. Making the Big Decisions: Plug-In vs. Hardwired
Once your panel is assessed, you and your electrician will need to decide exactly how the charger will be connected to your home. This brings us to one of the most common debates in the EV community: NEMA 14-50 vs hardwired installations. Both methods have distinct pros and cons, and a professional can help you decide which is best for your specific lifestyle.
The NEMA 14-50 Plug-In Setup
A NEMA 14-50 is a heavy-duty, four-prong 240-volt electrical outlet (the same type commonly used for electric ovens or RV hookups). In a plug-in setup, the electrician installs this outlet on your wall, and you simply mount your EV charger and plug it in.
Pros of Plug-In:
- Portability: If you move to a new house, you can simply unplug your charger, take it off the bracket, and take it with you.
- Easy Replacement: If the charger breaks, swapping it for a new one requires zero electrical work. You just unplug the old one and plug in the new one.
Cons of Plug-In:
- Speed Limits: Plug-in chargers are typically legally limited to a maximum output of 40 amps (which requires a 50-amp breaker).
- Nuisance Tripping: Recent updates to the National Electrical Code mandate that any 240-volt outlet installed in a garage must be protected by a GFCI (Ground Fault Circuit Interrupter) breaker. Because EV chargers already have built-in GFCI protection, plugging them into a GFCI breaker often causes “nuisance tripping”—where the two safety systems conflict and shut off the power randomly in the middle of the night, leaving you with an uncharged car in the morning.
- Outlet Wear and Tear: Commercial-grade NEMA 14-50 outlets are required because cheap, residential-grade outlets can melt under the continuous load of an EV charger.
The Hardwired Setup
In a hardwired installation, there is no outlet or plug. The electrician runs the conduit and wiring straight from the electrical panel directly into the internal terminals of the EV charger.
Pros of Hardwired:
- Maximum Speed: Hardwiring is the only way to achieve charging speeds above 40 amps. If you want a 48-amp charge (which requires a 60-amp circuit), the unit must be hardwired.
- Fewer Points of Failure: By eliminating the outlet and the plug, you remove potential points of heat buildup and electrical resistance. It is a cleaner, safer connection.
- Code Compliance Ease: Hardwired chargers do not require an external GFCI breaker at the panel, as the unit’s internal GFCI is deemed sufficient by the NEC. This entirely eliminates the nuisance tripping issue associated with plug-in units.
- Aesthetics: Hardwired units look significantly sleeker on the wall, as there are no thick cords dangling down to an outlet.
Cons of Hardwired:
- Less Portable: If you move or if the unit breaks, you cannot simply unplug it. You must hire an electrician to safely disconnect the wiring and cap the wires or wire in a new unit.
Charging Speed Differences by Amperage
Understanding the charging speed differences by amperage is essential when choosing between a hardwired or plug-in setup.
- 16 Amps (3.8 kW): Adds about 12-15 miles of range per hour. Suitable for plug-in hybrids or drivers with very short commutes.
- 32 Amps (7.6 kW): Adds about 25 miles of range per hour. Often the sweet spot for budget-friendly installations and older homes.
- 40 Amps (9.6 kW): Adds about 30 miles of range per hour. The maximum safe limit for a plug-in NEMA 14-50 installation.
- 48 Amps (11.5 kW): Adds about 35-40+ miles of range per hour. Requires a hardwired installation on a 60-amp circuit. Ideal for large EV trucks or SUVs with massive battery packs.
5. Preparing Your Space: Garages and Outdoors
Where you park your car dictates where the charger goes, and each location requires specific preparation and considerations. A professional installation includes a spatial consultation to ensure everyday usability.
How to Prepare Garage for Electric Car
If you are parking indoors, you need to consider the physical layout of the space. Learning how to prepare garage for electric car charging involves a few key steps:
- Decluttering and Space Planning: EV charging cables are typically 18 to 25 feet long. They are thick, heavy, and can become trip hazards. You need to identify a mounting location that is close enough to the car’s charge port so the cable doesn’t have to stretch tightly across walking paths.
- Cable Management: Professional installers will often recommend mounting the charger near the garage door so you have the flexibility to charge a car parked inside the garage, or a car parked outside in the driveway. They can also install cable retractors or holsters to keep the heavy cord off the floor, protecting it from being driven over or damaged.
- Wi-Fi Connectivity: Most modern chargers require a Wi-Fi connection for their smart features (more on this below). Garages, with their thick walls and distance from the home router, often have terrible Wi-Fi signals. Before the installation, test the signal strength in the garage. You may need to install a Wi-Fi extender or a mesh network node to ensure the charger stays connected.
Outdoor Charging Considerations
Not everyone has a garage. Millions of EV owners park in driveways, carports, or on the street. If your installation must be exterior, specific safety measures must be taken.
First, you must ensure you purchase an EVSE with robust outdoor weatherproofing for charging units. Look for hardware with a NEMA 4 or NEMA 4X rating, which means the unit is completely sealed against rain, snow, sleet, and dust, and can withstand extreme temperatures. (NEMA 3R is also common but offers slightly less water protection than NEMA 4).
Second, outdoor installations often require complex wiring routes. A professional electrician may need to run conduit along the exterior siding of your home or dig a trench through your yard to lay underground wires to a freestanding charging pedestal. Trenching must be done to specific depths according to local codes to prevent accidental damage from landscaping activities in the future, further highlighting why DIY is inappropriate for these scenarios.
6. Selecting the Right Charging Hardware
The market is currently flooded with EV chargers, ranging from ultra-cheap models on e-commerce sites to premium units backed by major automotive brands. Choosing the right hardware is a critical part of the installation process.
Connector Types: Universal vs Brand-Specific
Until very recently, the EV market was highly fragmented regarding charging plugs. When selecting hardware, you must understand the difference between universal vs brand-specific charging cables.
- J1772 (The Universal Standard): For the last decade, almost every non-Tesla EV sold in North America used the J1772 connector for Level 2 home charging. If you buy a standard universal charger (from brands like ChargePoint, Wallbox, or Grizzl-E), it will have a J1772 plug.
- NACS / Tesla (The New Standard): Tesla has always used its own proprietary plug, known as the North American Charging Standard (NACS). If you own a Tesla, a Tesla Wall Connector is the most seamless home charging solution. However, major automakers (like Ford, GM, Rivian, and others) are currently transitioning to the NACS plug.
If you buy a charger that doesn’t match your car’s native port, it isn’t the end of the world—you simply have to use an adapter. However, your installer can help you choose the best permanent hardware based on the vehicles you currently own and plan to own in the future.
Embracing Smart Technology
While a “dumb” charger simply delivers electricity when plugged in, a Wi-Fi-connected “smart” charger offers immense benefits. Investing in smart charging features for energy efficiency can save you a significant amount of money over the lifespan of your vehicle.
- Off-Peak Scheduling: Many utility companies offer Time-of-Use (TOU) pricing, meaning electricity is incredibly cheap in the middle of the night and very expensive during the late afternoon. A smart charger allows you to plug your car in at 5:00 PM when you get home, but program the unit to delay the start of charging until midnight when rates drop.
- Data Tracking: Smart chargers provide smartphone apps that show you exactly how many kilowatt-hours (kWh) of electricity your car is consuming and calculate the exact cost in dollars based on your local utility rates.
- Power Sharing: If you have two electric vehicles, some smart chargers allow you to install two units on a single electrical circuit. The chargers communicate with each other via Wi-Fi and automatically split the available power safely between the two cars, saving you the massive expense of running a second dedicated wire all the way to your electrical panel.
7. The Financial Side: Costs, Incentives, and ROI
The upfront cost of installing a Level 2 home charger can induce a bit of sticker shock, but when viewed as a long-term investment in your home’s infrastructure and combined with available incentives, the return on investment is undeniable.
Breaking Down the Costs
It is important to understand the typical residential charging infrastructure costs so you can budget accurately. The total cost is generally split into two categories: the hardware and the labor/materials.
- The Hardware (EVSE): A high-quality, reliable, safety-certified Level 2 charger typically costs between $400 and $700. Be extremely wary of generic, unbranded chargers sold for $150 online; they often lack essential Underwriters Laboratories (UL) safety certifications and pose a severe fire risk.
- Professional Installation Labor & Materials: This is where costs vary wildly depending on your home. If your electrical panel is in the garage and has plenty of spare capacity, the electrician may only need to run three feet of wire. This “simple” installation might cost $500 to $800. However, if your panel is in the basement on the opposite side of the house, requiring the electrician to fish 100 feet of heavy-gauge copper wire through finished ceilings and walls, the labor and material costs can easily reach $2,000 to $3,500+. Panel upgrades, if necessary, add another $2,000 to $4,000 to the bill.
Federal Tax Incentives
To help offset these costs, the US government offers financial assistance. Navigating the federal tax credit for home chargers (officially known as the Alternative Fuel Vehicle Refueling Property Credit, via IRS Form 8911) can save you a substantial amount of money.
As of recent legislative updates, eligible homeowners can claim a tax credit for 30% of the total cost of purchasing and installing an EV charger, up to a maximum credit of $1,000. It is vital to note that this credit is subject to specific geographical and income qualifications (primarily targeting rural and lower-income census tracts). A professional installer or your tax advisor can help you determine if your property address qualifies for this lucrative federal incentive.
Local and Utility Rebates
Even if you do not qualify for the federal credit, you should aggressively research local utility company rebate programs. Because utility companies want to encourage off-peak charging to prevent strain on the electrical grid, they frequently offer massive incentives to homeowners.
Some utilities will give you a $500 rebate just for buying a specific brand of smart charger that connects to their grid-management system. Other utilities offer to cover a large percentage of the installation labor costs, or they will switch your home to a specialized EV-friendly billing rate that dramatically lowers the cost of electricity overnight. Always check your local electric provider’s website before buying hardware, as some rebates are contingent on purchasing from a pre-approved list of chargers.
8. The Step-by-Step Professional EV Charger Installation Process
So, what exactly happens when you hire a professional for EV charger installation? Understanding the workflow can alleviate anxiety and help you prepare your home for the project.
Step 1: The Site Survey and Consultation
The process begins with an in-person or virtual consultation. The certified electrical contractor will assess your main panel, perform load calculations, and discuss your driving habits to determine the appropriate amperage. They will also measure the distance from the panel to the proposed charging location to calculate material costs (heavy-gauge copper wiring is quite expensive per foot).
Step 2: The Estimate and Permitting
Once you agree on the scope of work, the electrician will provide a detailed quote. Upon your approval, the contractor handles the bureaucratic heavy lifting by applying for the necessary permits with your local municipality. This ensures that the city is aware of the electrical upgrade and that the plans meet all local codes.
Step 3: The Rough-In and Wiring
On the day of installation, the crew will arrive and begin running the infrastructure. Depending on your home’s layout, this might involve running conduit along exterior walls, threading wire through an attic or crawlspace, or opening up drywall in a finished basement. Professional installers pride themselves on minimizing disruption; they know how to route wires cleanly and discreetly.
Step 4: Mounting and Final Connections
Once the wire reaches the destination, the electrician will mount the charging unit to the wall, ensuring it is anchored securely into a stud. They will then make the final high-voltage connections—either wiring an industrial-grade NEMA 14-50 receptacle or hardwiring the power directly into the EVSE’s terminal block.
Back at the electrical panel, they will install the correctly sized double-pole breaker and complete the circuit.
Step 5: Commissioning and Testing
A professional installation isn’t complete without commissioning. The electrician will turn on the power, test the voltage at the charger to ensure it is receiving a clean, steady flow of electricity, and help you connect the unit to your home Wi-Fi network. They will often perform a test charge using your vehicle (or a specialized testing device) to verify that the car and charger communicate flawlessly.
Step 6: The Final City Inspection
A few days or weeks after the installation is complete, a municipal electrical inspector will visit your home. The inspector will review the electrician’s work, checking wire gauges, breaker sizes, and torque specifications to ensure total compliance with the National Electrical Code. Once the inspector signs off, your permit is officially closed, providing you with documented proof of a safe, legal installation.
9. Future-Proofing Your Home Charging Setup
The landscape of electric vehicle charging is evolving rapidly. When you invest in an EV charger installation today, it is wise to think about your needs five or ten years down the road. A forward-thinking professional installer can help you future-proof your home.
Planning for Multiple EVs
If you are currently a one-EV household but anticipate replacing your secondary gas car with an electric model in the future, tell your electrician now. Instead of running a wire sized precisely for a 40-amp charger today, they might suggest running a thicker wire capable of handling 80 amps or 100 amps.
While the thicker wire costs slightly more upfront, it allows you to easily add a second charger later, or install a power-sharing dual-charger system, without having to pay for a completely new conduit run.
The Rise of Bidirectional Charging (V2H and V2G)
The next massive leap in electric vehicle charging technology is bidirectional charging—also known as Vehicle-to-Home (V2H) or Vehicle-to-Grid (V2G).
Currently, electricity flows in one direction: from your house into your car. However, modern EVs contain massive battery packs capable of storing enough energy to power an average home for several days. Bidirectional charging allows you to use your car as a backup generator during a power outage.
Companies like Ford (with their F-150 Lightning) and emerging hardware manufacturers are releasing bidirectional home charging stations. These setups require highly specialized installations, including a transfer switch (similar to what is required for a whole-home standby generator) to automatically disconnect your home from the utility grid during an outage. If bidirectional charging interests you, finding an electrical contractor who is trained in these advanced, cutting-edge installations is absolutely vital.
Routine Maintenance and Upkeep
The beauty of a professionally installed Level 2 charger is that it requires very little maintenance. Because there are no moving parts, the unit can sit on your wall for a decade delivering quiet, reliable power.
However, a few best practices will extend the life of your equipment:
- Inspect the cable regularly: Look for any kinks, tears in the insulation, or signs of wear and tear on the plug.
- Keep the connector clean: Dust and debris can build up inside the pins of the charging handle. Occasionally use a can of compressed air to blow out any debris to ensure a solid electrical connection with your car.
- Protect the handle: Never drop the charging handle onto a hard concrete garage floor, as this can crack the plastic housing and compromise the locking mechanism or water resistance.
Conclusion: The Ultimate Peace of Mind
Transitioning to electric driving brings incredible benefits—from zero tailpipe emissions and lightning-fast acceleration to the elimination of expensive trips to the gas station. But to truly reap the rewards of the EV lifestyle, a robust, dependable home charging station is essential.
While the upfront logistics of upgrading your home’s electrical system may seem daunting, partnering with a knowledgeable, certified professional transforms the experience. From navigating complex local permit requirements for charging equipment and ensuring safe electrical panel capacity for residential charging, to maximizing smart charging features for energy efficiency and securing rebates, the expertise of a professional is invaluable.
Cutting corners with DIY electrical work or cheap, uncertified hardware is never worth the risk to your home, your family, or your vehicle. By investing in a high-quality, professional EV charger installation, you are not just buying a piece of equipment—you are purchasing safety, convenience, and the ultimate peace of mind. You can go to sleep every night knowing that while you rest, your vehicle is fueling up safely, efficiently, and ready to take on whatever tomorrow brings.